The Mobee API Key is a digital access code that allows external systems or applications to connect to your Mobee account without requiring manual login. This feature is useful for:
- Automating trades with bots.
- Connecting your portfolio to a spreadsheet or dashboard.
- Automating withdrawals or asset conversions.
With an API Key, you can either read data or perform specific actions on your account, depending on the permissions you assign.
Benefits of Using a Mobee API Key
- Secure: You have full control over permissions and access.
- Flexible: Ideal for traders, developers, and investors.
- Efficient: Reduces manual work and increases automation.
Steps to Create an API Key in the Mobee App
Step 1: Complete Identity Verification (KYC)
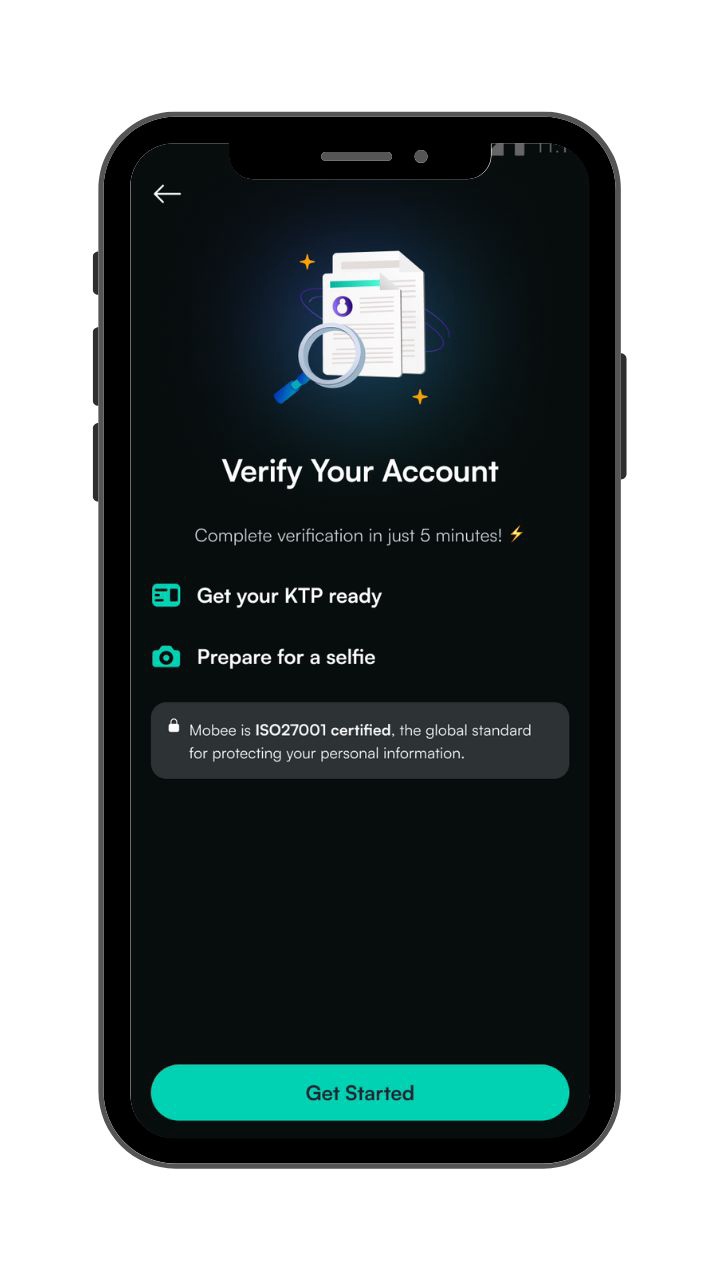
To access the API Key feature, your account must be verified through the KYC process.
Step 2: Go to Your Profile in the Mobee App
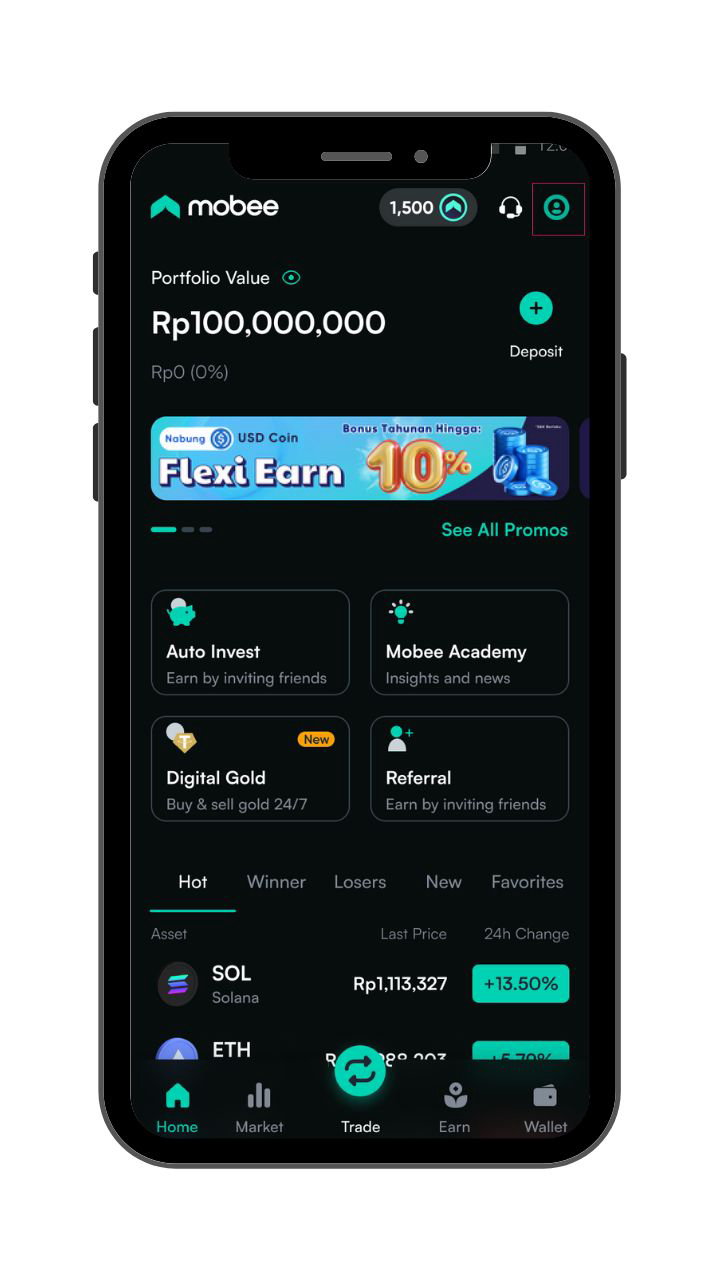
Open the Mobee app and tap the profile icon at the top right.
Step 3: Select the “API Management” Menu
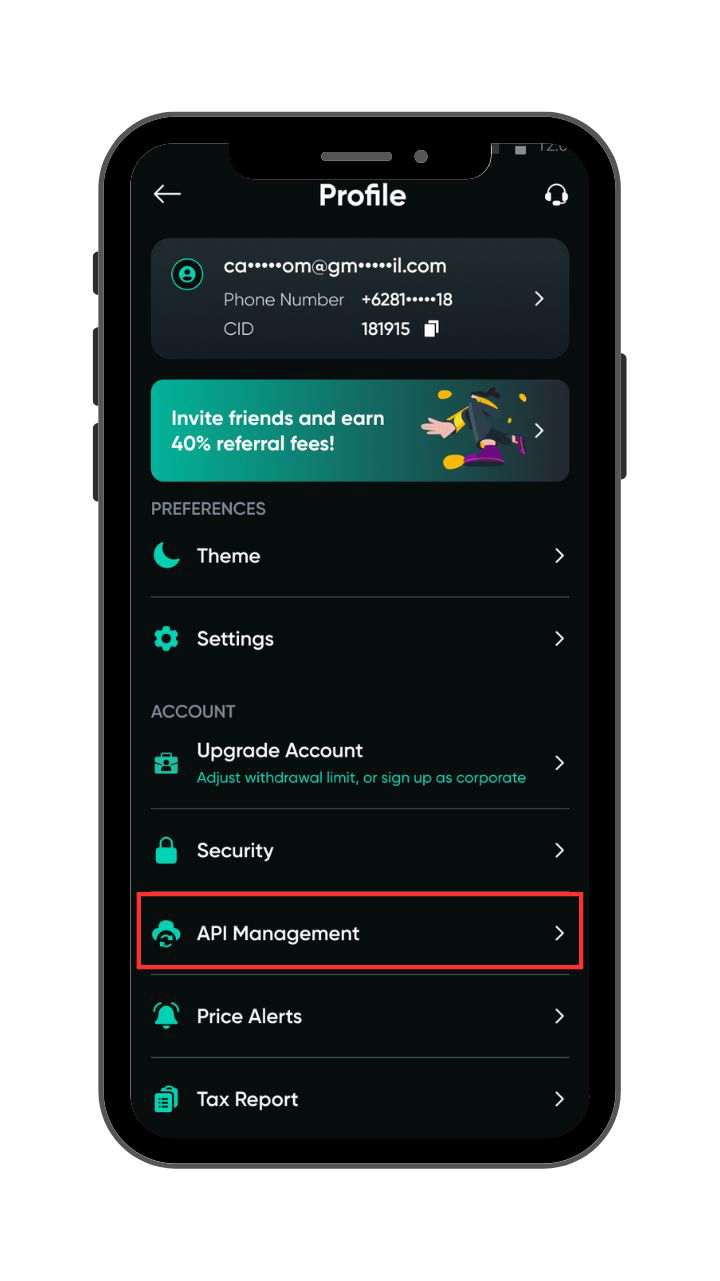
This will take you to the dedicated API Key management page.
Step 4: Tap the “Create API” Button
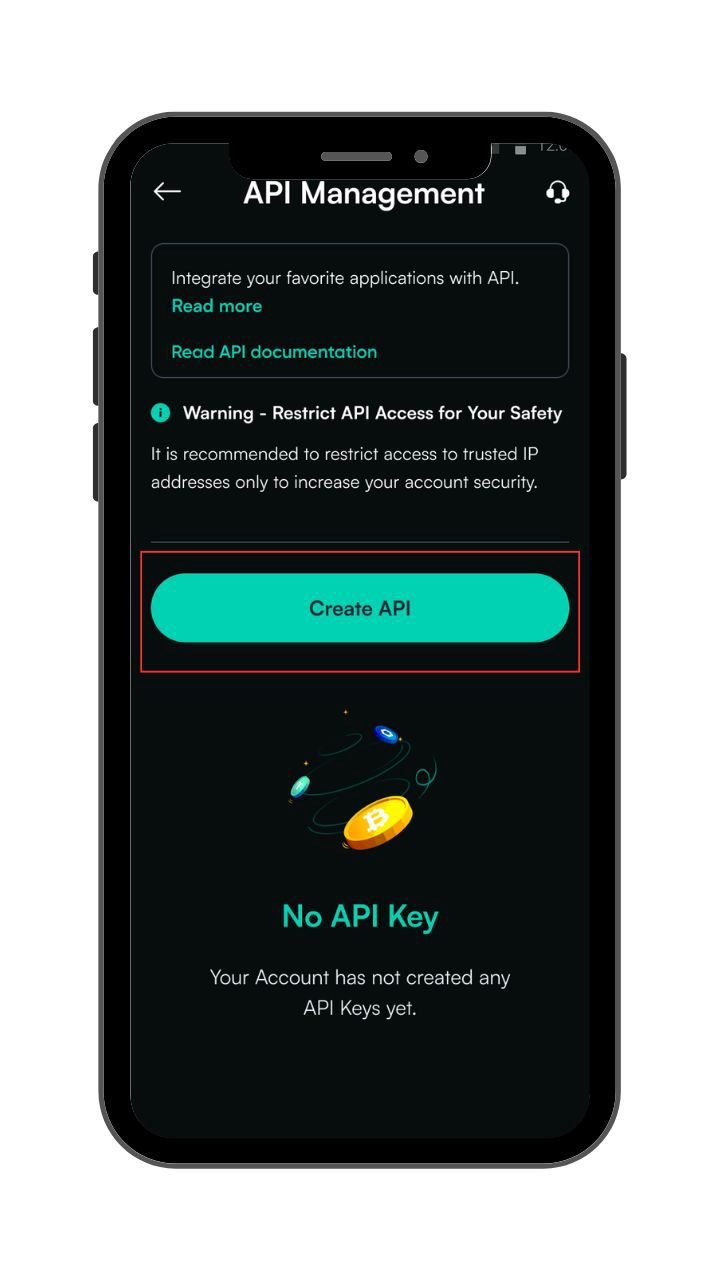
The API creation form will appear.
Step 5: Set API Permissions and IP Access Restrictions
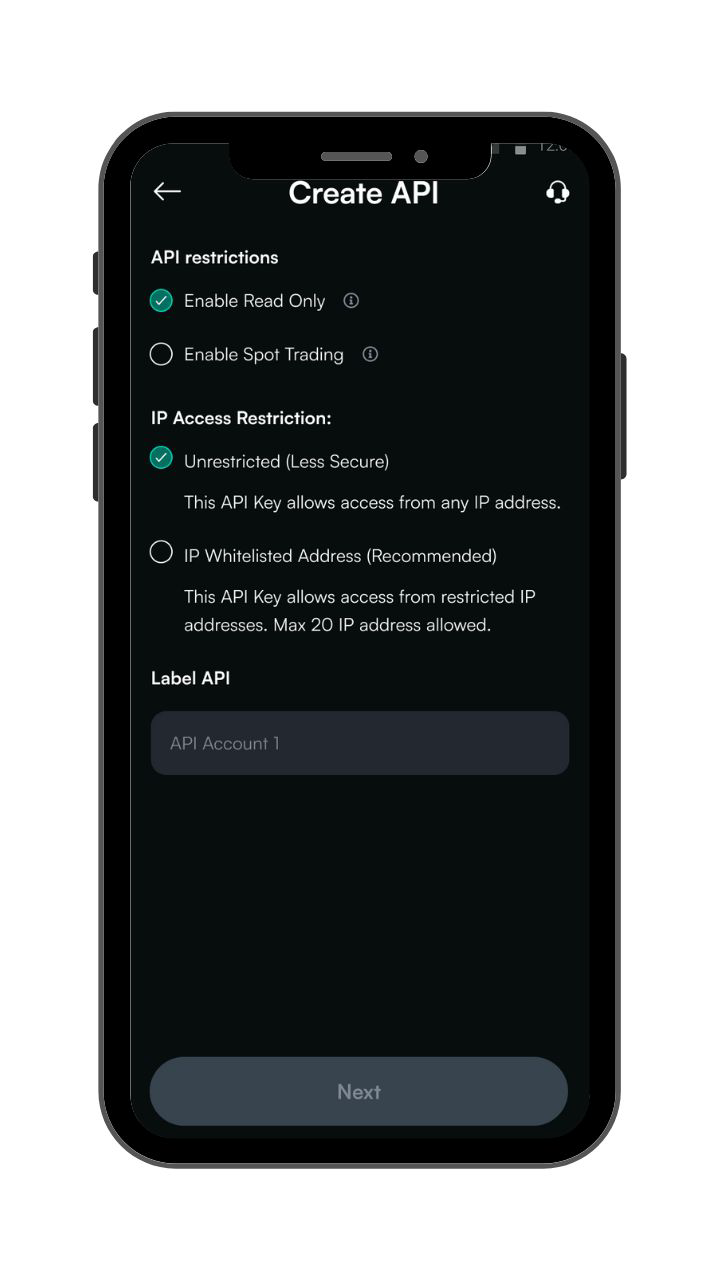
Before proceeding, you’ll need to define two important settings: the type of API access and the IP address restriction.
Choose API Permissions
When creating your API Key, you can enable one or both of the following options:
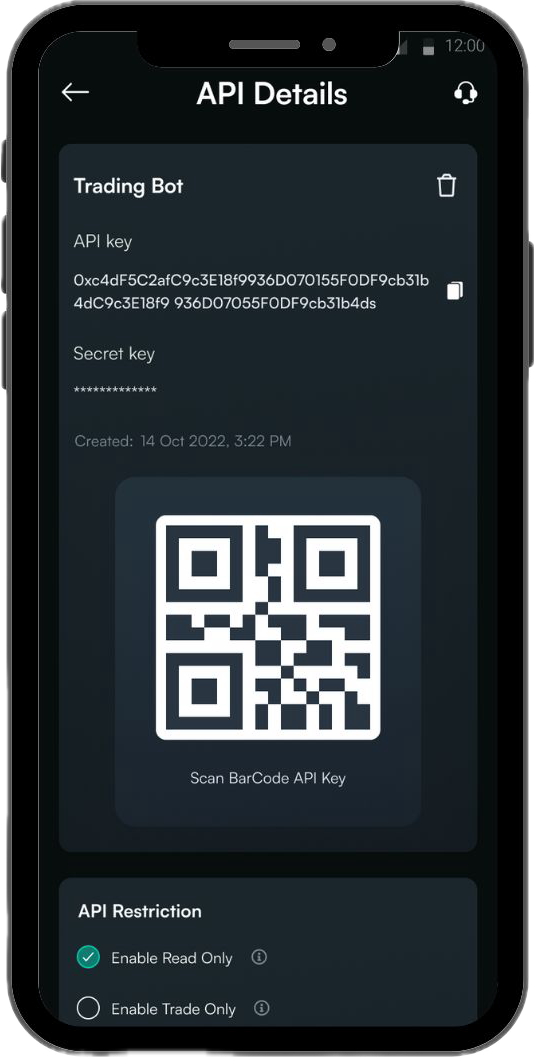
1. Read Only
- Can only view account data like balances, market prices, and transaction history.
- Cannot perform any actions such as trading, converting, or withdrawing funds.
- Ideal for portfolio tracking or syncing data to spreadsheets or dashboards.
2. Spot Trading
- Allows the API Key to place or cancel orders.
- Best suited for trading bots or automated strategies.
- Should be used with caution, especially if IP access is unrestricted.
You can activate one or both permissions depending on your needs.
Define IP Access Restrictions
To enhance security, you need to control who can access your API Key based on IP address.
1. Unrestricted Access
- The API Key can be used from any device or location, without limitations
- This option is less secure and is not recommended unless necessary
2. Whitelisted IP (Recommended)
- API Key can only be accessed from up to 3 public IP addresses that you specify
- Adds an extra layer of security—even if someone else knows your API Key, they cannot use it unless their IP is on the approved list
- Only public IP addresses are accepted. Local IPs like 192.168.x.x will not work
Security Tip:
If you enable Spot Trading, it is highly recommended to use the Whitelisted IP option to keep your API Key safe.
Step 6: Label Your API Key
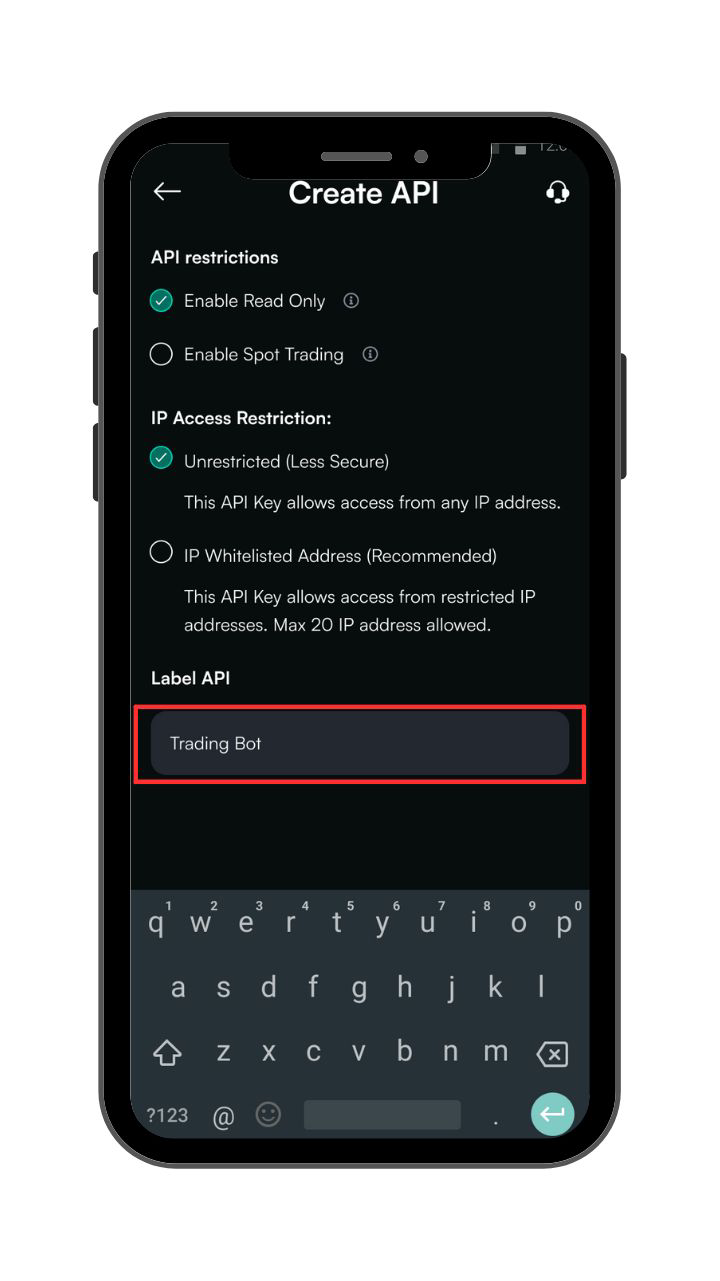
Choose a clear and meaningful name (e.g., “Daily Portfolio” or “Trading Bot”) so you can easily recognize it later. Once created, the label cannot be changed.
Step 7: Complete Security Verification
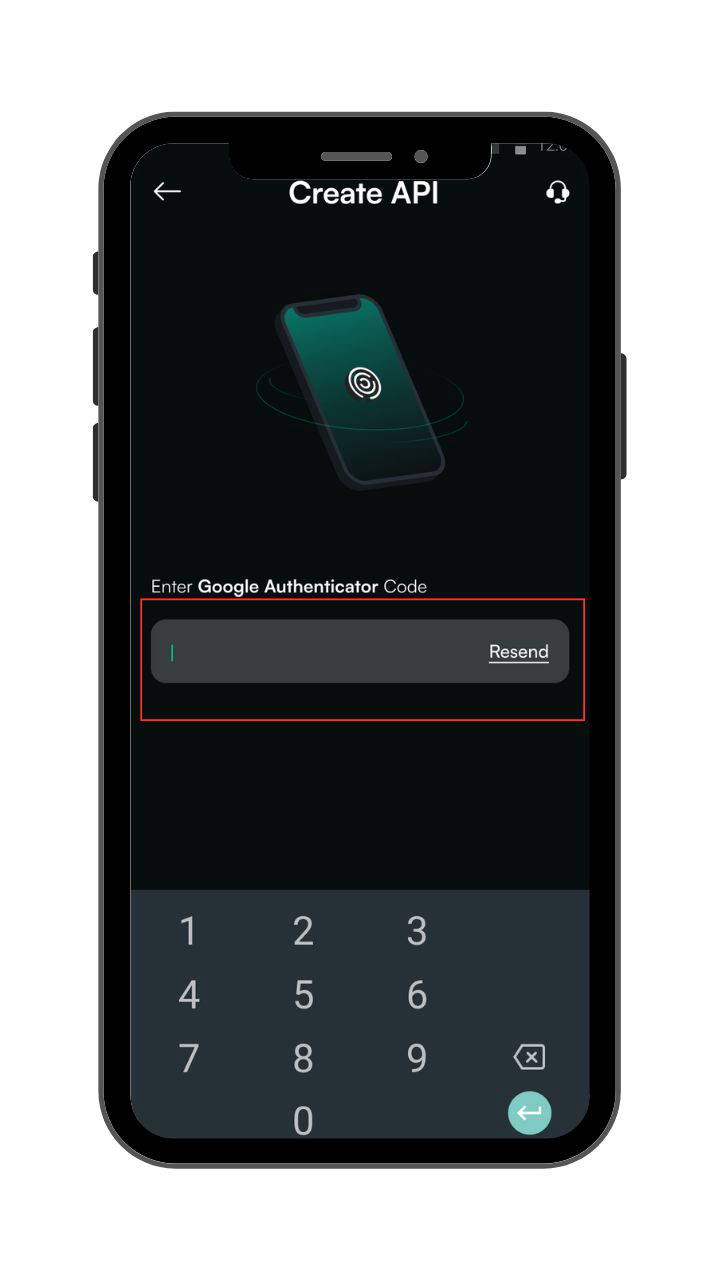
Finish the two-factor authentication (2FA) or passkey process to ensure extra protection.
Step 8: Store Your Secret Key Securely

The secret key is displayed only once. Please copy and store it securely. If you lose it, you must delete the API Key and create a new one.
Step 9: Done
Your API Key has been successfully created and can be managed anytime via the API Management menu.
Important Reminders Before Creating an API Key
- Make sure your account is KYC verified.
- Choose the correct permissions: Read Only or Spot Trading.
- Prepare your public IP address if using Whitelisted IP
- Label your API Key clearly.
- Store your secret key securely (it’s displayed only once).
- API Key settings cannot be edited. If you need to make changes, you must delete and recreate the key.

.webp)